By the time a Knot Standard suit reaches the customer, it has already gone through the entire process of creation, design and construction. The final product with its clean lines and tailored finish, its excellent drape and unique detailing is a work of beauty any artist would be proud to claim. But going from a bolt of cloth to the finished suit is as much a process as an art.
Each part of the suit’s construction is carefully considered and thought out. Like a modern skyscraper, the modern suit is built from the ground up with eyes on the sky.
Here’s how we think through a Knot Standard suit deconstructed:
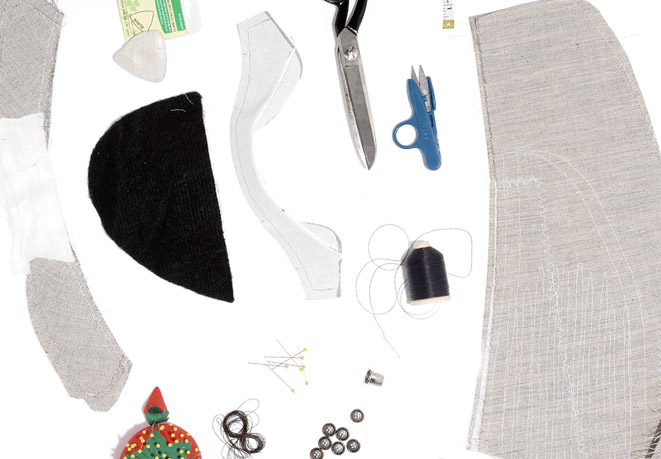
First start with the tools of the tailor. They have stayed the same for centuries – measuring tape, quality fabric, chalk, cutting shears, pins, thread, bias tape, thimbles, zippers and buttons.
Then consider the fabric. Quality super 120s English Worsted Wool. The better the fabric quality, the more luxurious and comfortable the suit.
Move on to the canvas. A fully canvassed jacket will require three layers: the first layer of standard canvas, a second layer of horsehair and finally a layer of needle punch.
Cutting the pattern. Unlike off-the-rack or made-to-measure clothes, Knot Standard suits are customized for each individual client. In Knot Standard’s unique method, digital lasers cut the pattern – made from a 3D image created for each individual client – directly from a bolt of cloth.
Once all these parts are assembled, construction begins when the expert tailors grab needle and thread and start to sew.
Though you may have never considered the various parts of a suit, we think through every small and important detail. Want something lighter and easier for summer? Try our Summer Blue Pinstripe suit for the perfect summer holiday attire. Elegantly casual, this white suit features a fine baby blue pencil stripe in a crisp white wool/linen blend that will keep you cool and comfortable all summer long.
A Reference Guide
1. Ariston Fabric Book 2. 120’s Australian Woolsted Woll (Wax chalk on top) 3. Sleeve head (adds structure & shape to top of sleeve. Gives a more structured look.) 4. Chalk 5. Cutting Shears 6. Tape Measure 7. Standard 2 ply Shoulder Pad 8. Hymo canvas adds support and structure to undercollar 9. Thread Snips (Trimming lose ends) 10. Pin Cushion 11. Basting Thread (seambinding) Used for the edges of the suit. (Runs on the front of the jacket) 12. Thimble 13. Buttons 14. Full 3 layer canvas for the front of the jacket. 1st layer standard canvas hymo. 2nd horsehair layer. 3rd needle punch or dometce (note: 1 shoulder pad basted in) 15. Large Roll heavier thread (designed for buttonholes) 16. Suit jacket lining 17. Sleeve lining 18. Bias Tape (seambinding front) Used for edges of the suit 19. Suit Patterns i. (back panel) ii. (Side body panel) iii. (front panel)

